frida를 이용한 후킹 예제
`Frida Install`
Frida를 설치하기 위해 아래 명령어를 입력해 준다.
pip3 install frida
pip3 install frida-tools
`Frida, Hello world`
Frida 설치가 끝나면, Frida를 이용해서 Hello world를 출력해보자.
Hello world를 출력하는 방법은 여러가지 방법이 있다.
`첫번째` 방법은, 작업 폴더에 notepad.js 파일을 생성한 뒤, 아래 코드를 작성해준다.
frida를 실행하기 위해서 타겟 프로그램을 실행해야 한다.
필자는 notepad를 실행한 뒤, 아래 명령어를 입력하면 `[사진 1]` 처럼 출력되는 것을 볼 수 있다.
// notepad.js
console.log("Hello world");
frida -l .\notepad.js notepad.exe
`두번째` 방법은, python을 이용해서 Hello world를 출력하는 방법이다.
똑같은 작업 폴더에 `notepad.py` 파일을 만든 뒤, 아래 코드를 작성한 후 실행하면 `[사진 2]` 처럼 출력되는 것을 볼 수 있다.
# notepad.py
import frida

session = frida.attach("notepad.exe")
script = session.create_script(open("notepad.js").read())

script.load()
input()
session.detach()
마지막 `세번째` 방법은, `notepad.js` 파일을 쓰지 않고 python 파일에 js 코드를 작성하는 방법이 있다.
위에서 작성한 `notepad.py` 파일에 코드를 일부분 수정한 뒤(아래 코드), 실행하면 결과는 똑같이 출력되는 것을 볼 수 있다.
# notepad.py
import frida

s = """
console.log('Hello world');
"""

session = frida.attach("notepad.exe")
script = session.create_script(s)

script.load()
input()
session.detach()
이렇게 3가지의 방법으로 Hello world를 출력해 보았다.
이 방법들 중, 필자는 첫번째 방법으로 글을 작성해 갈 것이다.
`Frida, Hooking`
필자는 notepad 프로그램을 대상으로 함수를 Hooking 하는 코드를 작성해 보겠다.
`MessageBoxW` 라는 API는 어떤 DLL 파일에서 호출되는지 모른다면, 2번째 줄 처럼 `Module.findExportByName` 함수를 통해 첫번째 인자에 `null`을 주면 알아서 해당 함수의 주소를 리턴해준다.
`MessageBoxW` 가 동작하게 되면 `Interceptor` 하게 되어 `onEnter` 이벤트 핸들러가 동작하게 된다.
// notepad.js
const addrMsgBoxW = Module.findExportByName(null, "MessageBoxW");

Interceptor.attach(addrMsgBoxW, {
    onEnter: function(arg){
        console.log("Message Box !");
    },
    onLeave: function(ret){

    }
})
위 코드를 실행하고 notepad 프로그램에서 `ctrl + f` 단축키를 통해 일부러 message box를 띄워보게 한다면, [사진 5] 처럼 `Interceptor` 되어 `console.log` 가 동작하게 된다.
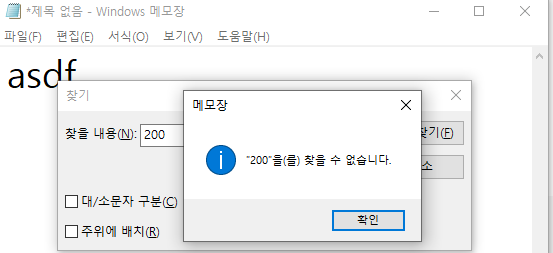

위 행위를 다시 정리하자면, `MessageBoxW` 에 `hooking`을 하여 message box가 동작할 때를 기다린다.
message box가 동작하게 되면 `hooking` 되어 `onEvent` 이벤트 핸들러가 동작하게 된다.
이번에는 `MessageBoxW` 함수의 인자를 출력해보자.
이 함수는 [사진 6] 처럼 4개의 인자를 가지고 있다.
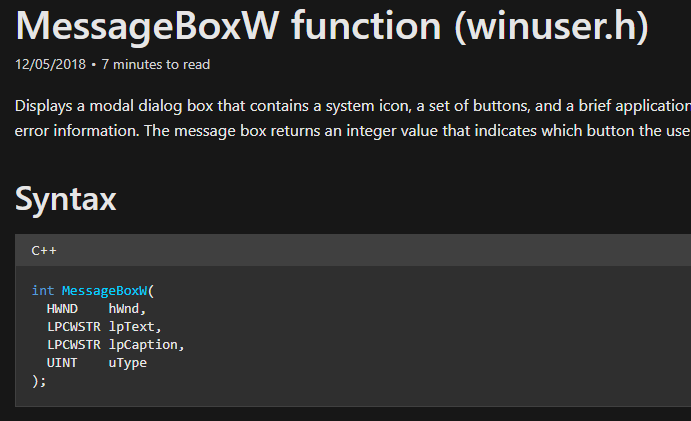
위 함수의 인자를 보기 위해, `onEvent` 이벤트 핸들러 안에 코드를 추가한다.
코드를 추가한 뒤, 실행하면 인자의 주소가 출력되는 것을 볼 수 있다.
const addrMsgBoxW = Module.findExportByName(null, "MessageBoxW");

Interceptor.attach(addrMsgBoxW, {
    onEnter: function(arg){
        // Add
        console.log("args: ", arg[0], arg[1], arg[2], arg[3]);
    },
    onLeave: function(ret){

    }
})
위에서 출력된 인자의 값을 보기 위해 `Memory.readUtf16String()` 함수를 사용한다.
[사진 6]을 참고하면 두번째 인자와 세번째 인자가 문자열을 가리키고 있는 포인터인 것을 알 수 있다.
따라서, 위에서 작성한 코드에 추가적으로 작성해 준다.
const addrMsgBoxW = Module.findExportByName(null, "MessageBoxW");

Interceptor.attach(addrMsgBoxW, {
    onEnter: function(arg){
        console.log("args: ", arg[0], arg[1], arg[2], arg[3]);
        // Add
        console.log(Memory.readUtf16String(arg[1]));
        console.log(Memory.readUtf16String(arg[2]));
    },
    onLeave: function(ret){

    }
})
위 결과는 [사진 4]에서 message box가 출력될 때, message box의 제목과 내용이 출력되는 것을 볼 수 있다.
우리는 `MessageBoxW`를 `hooking` 했다. message box가 출력되기 전에 인자를 다른 값으로 바꿔서 출력할 수 있다.
`Memory.writeUtil16String()` 함수를 사용하면, `Interceptor` 된 함수의 인자를 다른 값으로 바꿀 수 있다.
아래에 1줄을 더 추가하여 실행하면, message box의 제목이 `Universe` 로 바뀐 것을 볼 수 있다. (짱신기!)
const addrMsgBoxW = Module.findExportByName(null, "MessageBoxW");

Interceptor.attach(addrMsgBoxW, {
    onEnter: function(arg){
        console.log("args: ", arg[0], arg[1], arg[2], arg[3]);
        console.log(Memory.readUtf16String(arg[1]));
        console.log(Memory.readUtf16String(arg[2]));
        // Add
        Memory.writeUtfl16String(arg[2], "Universe");
    },
    onLeave: function(ret){

    }
})
마지막이다.
이번에는 message box를 바로 띄우는 코드를 작성할 것이다.
우리는 `MessageBoxW` 함수의 주소를 알고 있으므로, 이것의 복제본을 만들어서 원하는 타이밍에 함수를 실행 시킬 수 있다.
`new NativeFunction()` 을 사용하여 함수를 만들 수 있다.
인자 구성은 대충 다음과 같다.
new NativeFunction(addr_func, addr_func_return_type, addr_func_arg)
위를 봐도 이해가 되지 않는다면, 아래 코드를 보자.
- 첫번째 인자: `MessageBoxW` 함수의 주소
- 두번째 인자: `MessageBoxW` 함수의 리턴 값
- 세번째 인자: `MessageBoxW` 함수의 인자들 (list로 작성)
이렇게 `MsgBoxW` 변수에 결과물을 저장하고, [사진 4]를 참고하여 인자를 넣어준다.
참고로 두번째, 세번째 인자는 문자열이 아닌 포인터를 넣어야 하므로 `Memory.allocUtf16String()` 함수를 써서 문자열을 저장하는 주소를 할당받아, 이를 인자로 넘겨 준다.
const MsgBoxW = new NativeFunction(addrMsgboxW, "int", ["int", "pointer", "pointer", "int"]);
MsgBoxW(0, Memory.allocUtf16String("content"), Memory.allocUtf16String("title"), 0x40);
그래서 아래 처럼 작성한 뒤, 실행하자마자 message box가 출력되는 것을 볼 수 있다.
const addrMsgBoxW = Module.findExportByName(null, "MessageBoxW");

const MsgBoxW = new NativeFunction(addrMsgBoxW, "int", ["int", "pointer", "pointer", "int"]);
MsgBoxW(0, Memory.allocUtf16String("content"), Memory.allocUtf16String("title"), 0x40);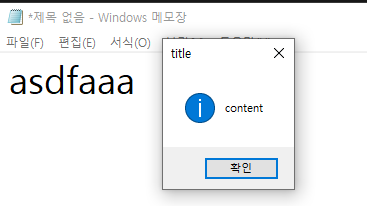
`여담`
javascript는 기존에 정의 되어 있는 것을 다른 함수로 혹은 다르게 동작하게끔 재정의가 가능하다.
예를 들어, `alert()` 함수가 있는데 아래 코드 처럼 작성한다고 하자.
alert = (i) => console.log(i)
alert(1)

// result: 1
위 코드를 보면 `alert()` 함수가 재정의 되어서 호출하게 되면 console.log() 함수가 동작하게 된다.
이렇듯, frida를 사용하면서 느낀게 javascript 언어를 사용하여 특정 함수에 hook을 하고 함수의 인자 등을 바꾸어 동작을 바꿀 수 있는 것이다.
이 부분에 대해 신기하게 다가왔다.
'🔒Security' 카테고리의 다른 글
| Log4j 취약점(CVE-2021-44228) Log4Shell 발생 원인 및 실습 (0) | 2021.12.24 |
|---|---|
| [CVE-2021-39350] wordpress FV flowplayer 분석 (0) | 2021.10.10 |
| 한글 2020 문서 암호화 과정 분석 (0) | 2021.07.23 |
| [pwnable] - glibc 2.24 이상 버전에서 _IO_FILE vtable check bypss (0) | 2020.10.07 |
| [pwnable] - _IO_FILE structure and vtable overwrite (0) | 2020.10.02 |